INTRODUCTION
This all started with squirrels.
Black oil sunflower seeds are a cheap and nutritious food for wild birds. However, when presented with a surplus of seeds in a feeder the lazy little buggers will toss onto the ground any that aren't immediately easy to crack. This makes the squirrels happy, but those destructive tunnelling rodents have been undermining my backyard in their zeal to scavenge the discarded seeds.
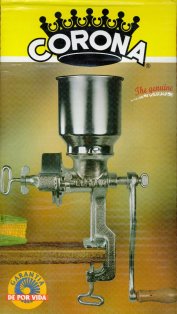 Using hulled sunflower seeds is an obvious way to reduce the waste, but expensive. I began to wonder if the Net might offer any practical suggestions for dehulling sunflower seeds, and found this: A grain dehuller attachment for the Corona hand cranked grain mill--"a gift to humanity" designed to hull rice, spelt wheat, quinoa and millet.
Homebrew enthusiasts and a few other hardy souls are familiar with the Corona mill, an infamous piece of cast iron hardware. Manufactured in Medellin, Colombia, I'm told it is a knockoff of the Porkert hand mill from Czechoslovakia. [NOTE: The Victoria mill is nearly identical to the Corona, and is said to be from the same manufacturer. Most reviewers state that neither of these two can be recommended for milling flour for home baking purposes.]
There is another webpage which mentions a defunct manufactured version of this same dehuller attachment. This article discusses hulling sunflower seeds with the attachment, going so far as to recommend varieties and giving specific tips on adjusting the Corona mill to maximize results--all as if they had actually used it for that purpose. Incidentally, these folks did not respond to requests for additional information.
A widely posted Organic Gardening article from April 1979, discussing home production of sunflower seed oil, stated that the Corona mill (without this attachment) "did a passable job" of dehulling sunflower seeds.
Taking all this as encouragement, I decided to try to make the attachment and see what kind of results it would produce.
 WARNING: Before you go any further, you should know that the results were very poor. Regardless of how many adjustments were made to the mill, what was produced is a mess made up of a few cracked hulls, many whole seeds, empty husks, seed fragments, and a large quantity of a gritty residue composed of oily flour and sawdust. There was absolutely no difference between the product of the unmodified mill or one with the dehuller attachment.
I conclude that using the Corona mill (with or without this dehuller attachment) to hull sunflower seeds is futile.
However, because the attachment was originally designed for hulling a variety of grains and someone may find the information useful, what follows is an illustrated guide to making the dehuller attachment. Bear in mind that the original design and methods were intended for third world conditions or are from people who apparently imagine there is virtue in suffering. I suspect there was a lot of wishful thinking in their reports as to its efficacy.
MATERIALS
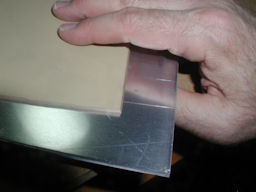
The instructions found at the first link (above) blithely state it is made from a steel washer, gum rubber and crazy glue. Good luck locating a four inch diameter steel washer and, beyond that, one with the correct size central hole. I decided to fabricate a metal disk from sheet aluminum instead, aluminum being workable with the tools owned by the majority of us who don't have a machine shop in our garage.
Adhesive -- The cyanoacrylate adhesisve (AKA Krazy Glue or Super Glue) in the original plans is easily found at any variety, craft or hardware store. I've never liked working with cyanoacrylate glue, so I also tried a couple others: Liquid Nails Perfect Glue and Gorilla Glue. Though the cyanoacrylate has done the best, none of these three has managed to hold up completely reliably under the shearing forces encountered in operating the mill. The rubber invariably begins to peel off at the inner circumference, forming an expanding pocket that traps seeds and debris. I'm still looking; my next try is GOOP E6000. Any suggestions would be appreciated.
Gum rubber was specified in the original instructions as it is said to be more resistant to abrasion. I suspect that very inexpensive red rubber (available in small sheets from any local hardware store) would work as well, but I decided to stick with the original specification. It turns out that gum rubber is used by mechanics to fabricate gaskets, and is probably available from automotive specialty supply houses. I couldn't find any near me who were willing to sell a small size sheet.
Aluminum sheet likewise has a variety of uses and sources but, again, I couldn't locate any in the size needed at any retail hardware or home supply stores.
I decided to save further time and trouble and order online. The instructions don't specify a thickness for either the rubber or metal, so I looked at what was available and compromised on one-eighth inch for both. The one source that stocked a good selection of both materials at reasonable prices was Small Parts, Inc. In the table which follows I have given Small Parts' item numbers, descriptions and prices.
| ITEM |
DESCRIPTION |
UNIT PRICE |
| PGRS-0125-E |
PURE GUM RUBBER TAN 1/8IN THICK 12 X 12 |
16.50 EA |
| SMA-125-D |
ALUM SHEET .125 THICK 12 X 12 TYPE 5052-H32 |
11.78 EA |
Obviously the metal disk is the major part of the fabrication. I was assured that working with aluminum is not much more difficult than wood, so I didn't purchase any special tools and used what I already had available. You should use whatever you're comfortable with.
| The tools you choose are up to you, as is their safe use. Wear proper protective gear and educate yourself in all appropriate safety precautions before working with the tools and materials.
|
